How to Use PinVari — A Full Visual Tour

PinVari is a native Mac app with one idea at its heart: instead of describing what you want changed, you point at the exact thing on your screen and say it out loud. PinVari captures the real UI element — its name, its role, a screenshot, and your words — and hands the whole bundle to your AI coding agent so it fixes the right thing the first time.
This is the full tour. By the end you will know every gesture, every hotkey, and where each thing lives. Screenshots throughout are the real app.
The one move: point, speak, hand off
Press the capture hotkey (⌥⌘A by default), and PinVari freezes the screen so nothing moves under you. Now circle anything — a button, a field, a whole area — and talk. You can circle several things in one breath; each gets its own number.
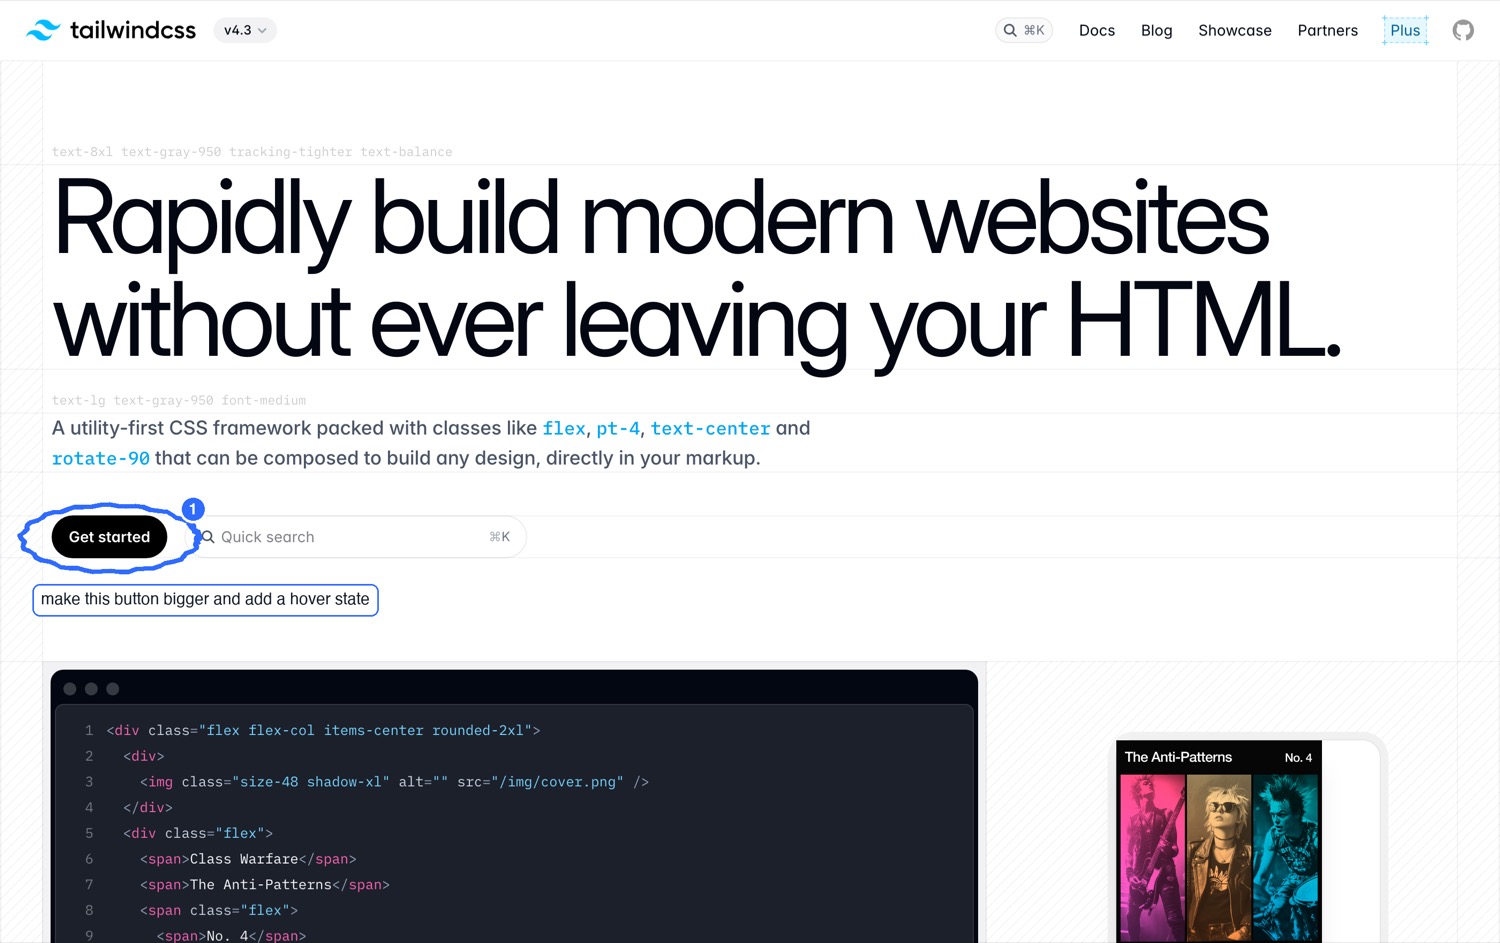
It works on any site or app the same way — circle the thing, say the fix:
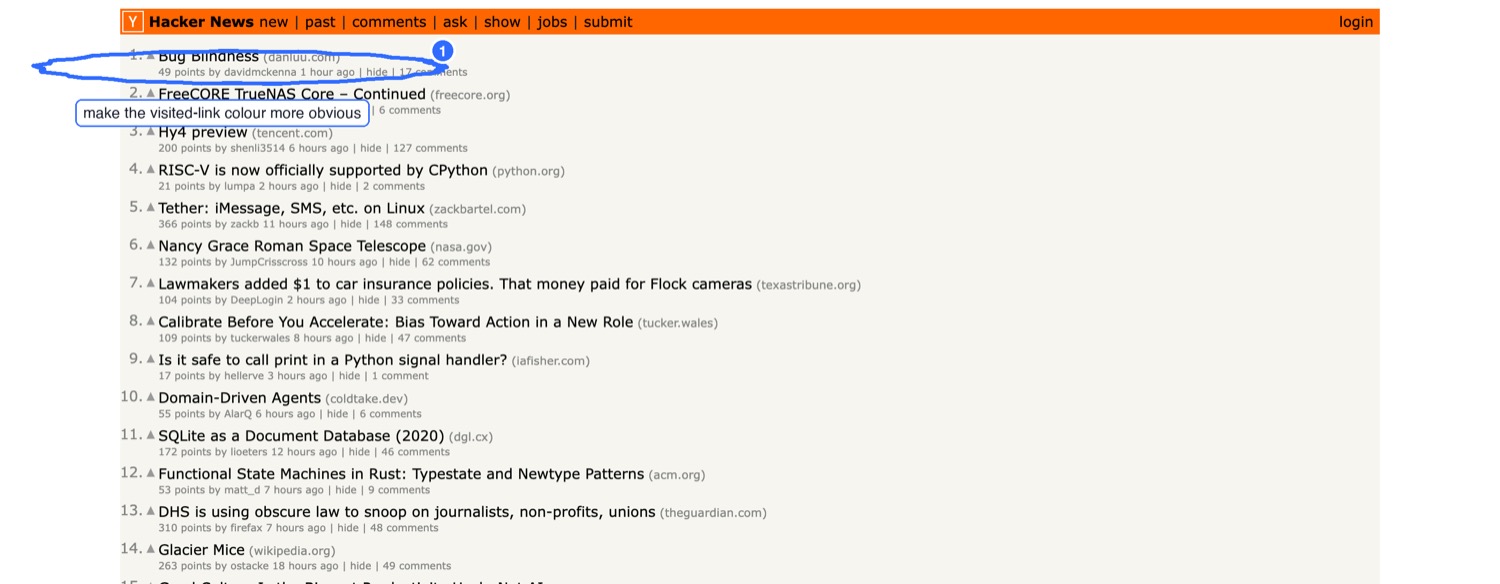
While you are marking, the capture bar sits at the top of the screen. It shows the timer, how many marks you have made, and whether it is hearing you. Press the hotkey again — or hit Return — to file the capture; press Escape to throw it away.
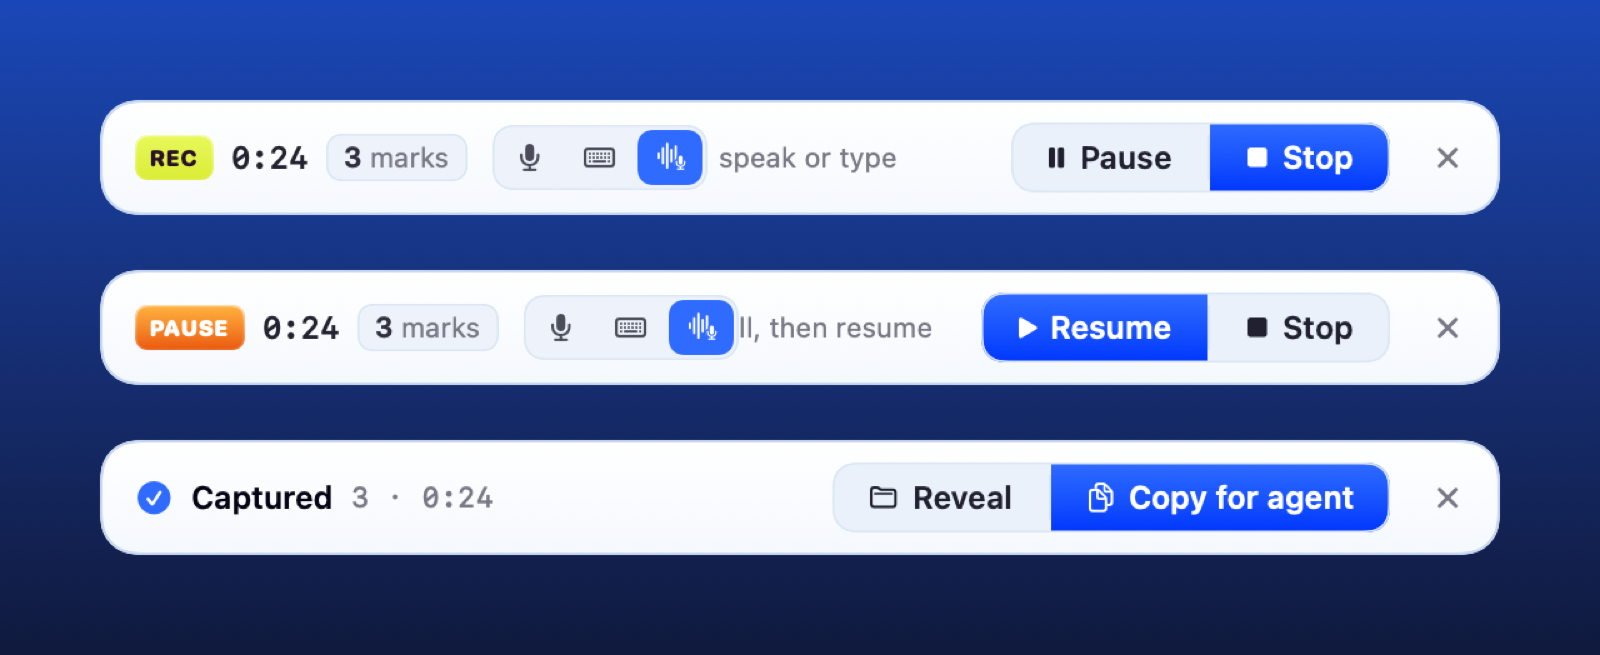
That is the whole gesture. Point, speak, done. Everything else in PinVari is about where those captures go and how your agent reads them. If you want the deeper idea behind why a named element beats a screenshot, read what spatial context is.
The island: your captures live at the notch
Every capture drops into the island — a quiet panel that tucks into the notch (or the top of the screen on Macs without one). It stays out of your way until you need it, then expands into a tray of cards: what you said, the type (bug, feature, note), the app it came from, and a thumbnail.
A green agent badge appears on a card the moment your AI agent has read it, so you always know what has been picked up. Hover the island and a row of keyboard hints appears along the bottom — the live map of what every key does right now.
The dashboard: every note in one tidy place
Open the dashboard and you get the full command center: a grid of every capture, sorted into Inbox, Filed, and Discarded, plus auto-folders for each app you captured in. Click any card and the inspector shows the screenshot, the marks, the resolved element, and the exact transcript of what you said.
From here you can Copy for agent (a rich bundle for a connected agent) or Copy for a browser AI — a clean, self-contained prompt that pastes straight into a ChatGPT or Claude chat, with the exact element and your words inline. Select several and Copy as brief rolls them into one ordered task list.
Dictate anywhere: hold a key, speak, it types
PinVari also does hold-to-talk dictation, anywhere on your Mac. Click into any text field — an email, a form, your terminal — hold the dictation key, speak, and release. Your words are transcribed on-device and typed into the field for you.
The default key is the 🌐 (Fn) key. If you already run Wispr Flow (which uses Fn), PinVari automatically moves to hold right ⌘ so the two never collide. You can pin either key in Settings.
What makes it feel sharp is the on-device AI editor. It runs after you speak and before it types: it strips the "um"s, fixes punctuation, applies your self-corrections ("make it blue — no wait, green" becomes "make it green"), and honors spoken commands like "in lower case." A live waveform pill shows it hearing your actual voice, then a green check when the text lands. For the background on why hold-to-talk beats menu dictation, see push-to-talk voice for Claude Code on Mac.
Everything you dictate is remembered in the Dictation sidebar — when you said it, the exact words, and where it went (which app, which window, which field). No screenshots, just a clean timeline you can hand to any agent so it understands what you have been writing and where.
Every hotkey, and what it does
Every one of these is remappable in Settings, and PinVari will never take a shortcut that another app already owns — if there is a conflict, it steps aside and tells you.
| Hotkey | What it does |
|---|---|
| ⌥⌘A | Start a capture — freeze the screen, circle things, speak. Press again or Return to file, Escape to discard. |
| ⌥⌘V | Voice-only capture — grab what you are focused on and just talk, no circling. |
| ⌥⌘P | Pause / resume a capture, so you can scroll a long page mid-session. |
| ⌥⌘R | Record a workflow — a named, step-by-step trail of what you did, as real UI elements, not coordinates. |
| Hold 🌐 (Fn) | Dictate anywhere — speak while held, release to type into the focused field. Auto-switches to hold right ⌘ when Wispr Flow is present. |
| Escape | Cancel a pending dictation, or discard the capture you are marking. |
Two small notes. First, a quick tap of the Fn key still belongs to macOS (the emoji panel) — dictation only arms after a brief hold, so you never trigger it by accident. Second, holding the key does nothing to the screen on its own; it is a passive listener, which is exactly why it is safe to bind to a modifier.
It all stays on your Mac
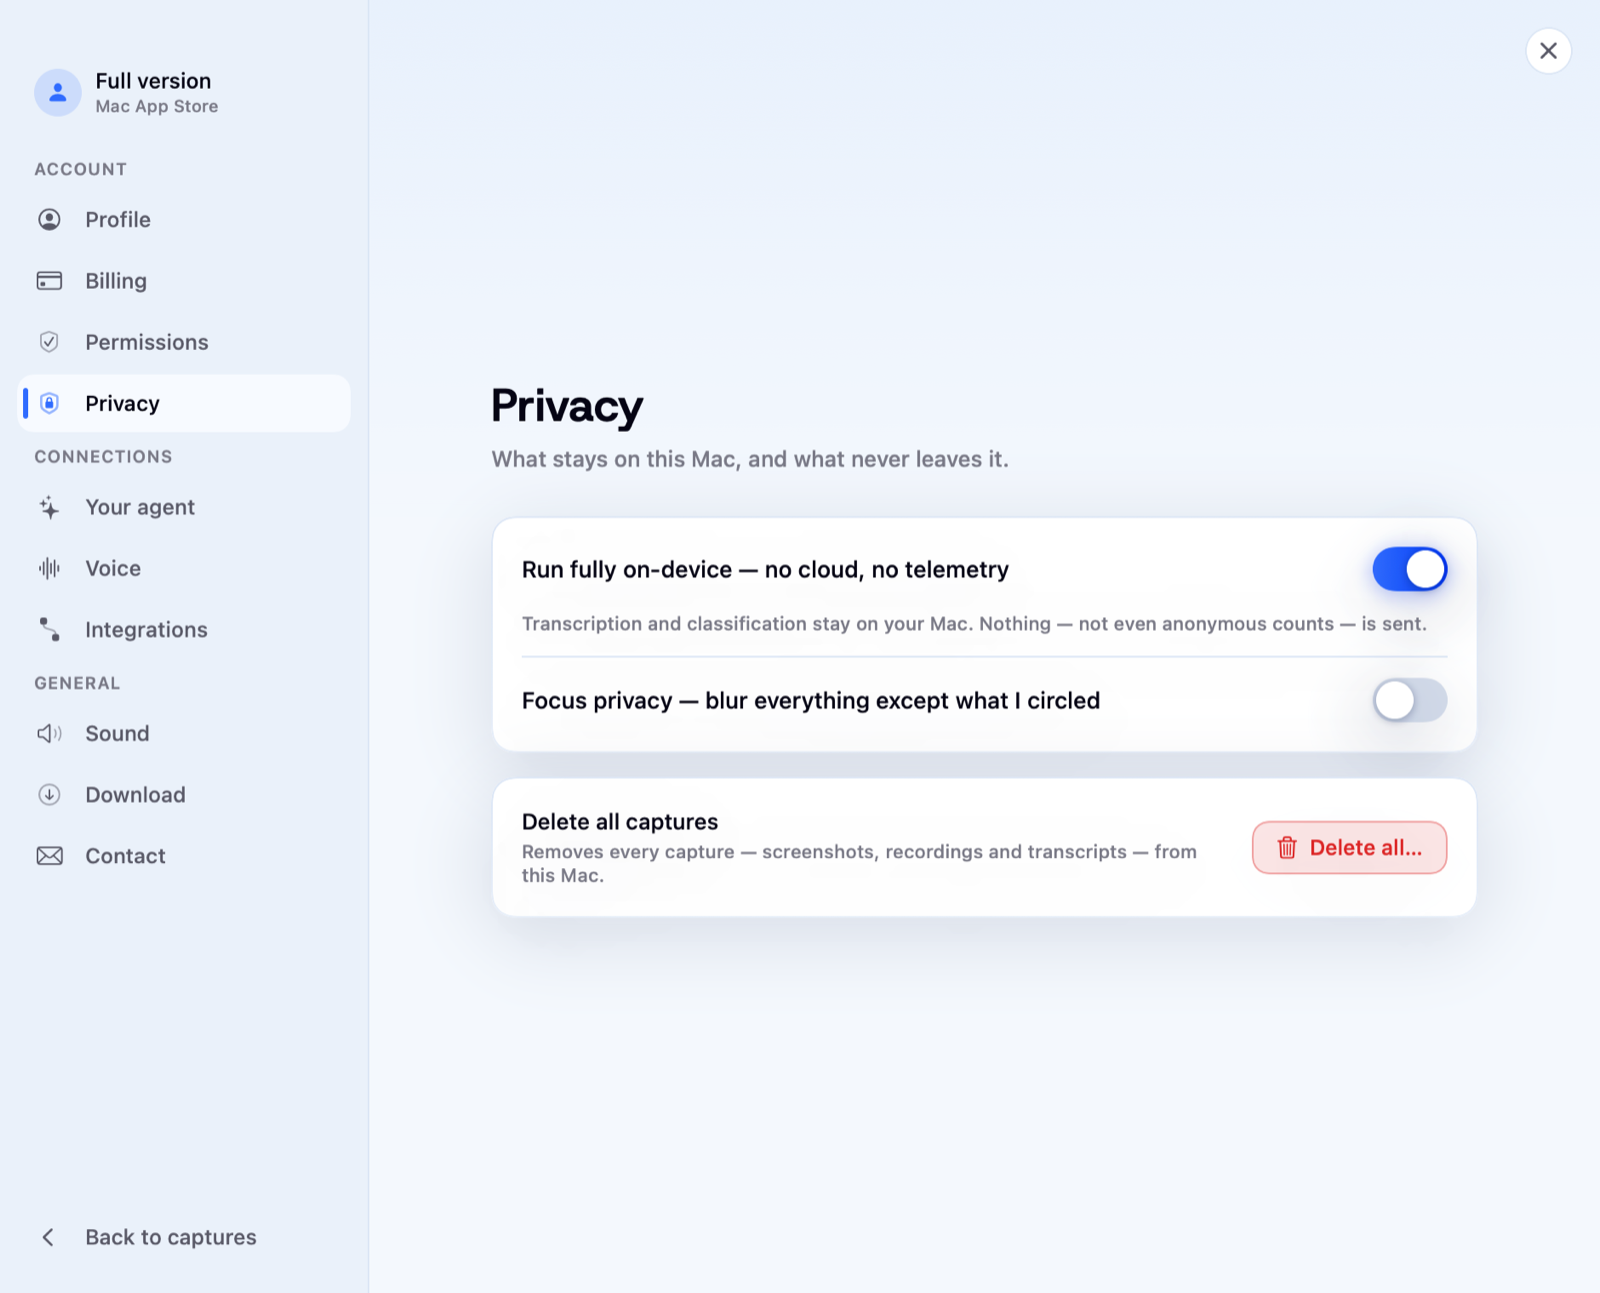
Transcription runs on-device. The AI cleanup runs on-device. Your captures and your dictation history live on your Mac. Nothing leaves unless you choose to hand a note to your agent — and even then, only that note.
Get started
Install PinVari, grant the permissions it walks you through, and let it install the high-accuracy voice model in the background. Then press ⌥⌘A, circle the first thing that annoys you, and tell it what you want. Your agent takes it from there.
If you build with Claude Code or Cursor, the one-command connect in the app wires PinVari straight into your agent over a local link — more on that in how to give Claude Code context. Ready to try it? Get PinVari.
Hand your agent the exact element
PinVari resolves what you point at into a named, executable instruction — on-device, no keys, your own agent. One click inside PinVari connects Claude Code, Cursor, VS Code or Codex — or paste one CLI line from pinvari.com/connect.
PinVari → Connect → your agent (one click)Get PinVari — $39 →