Design Review Software Engineering: Process & Tools
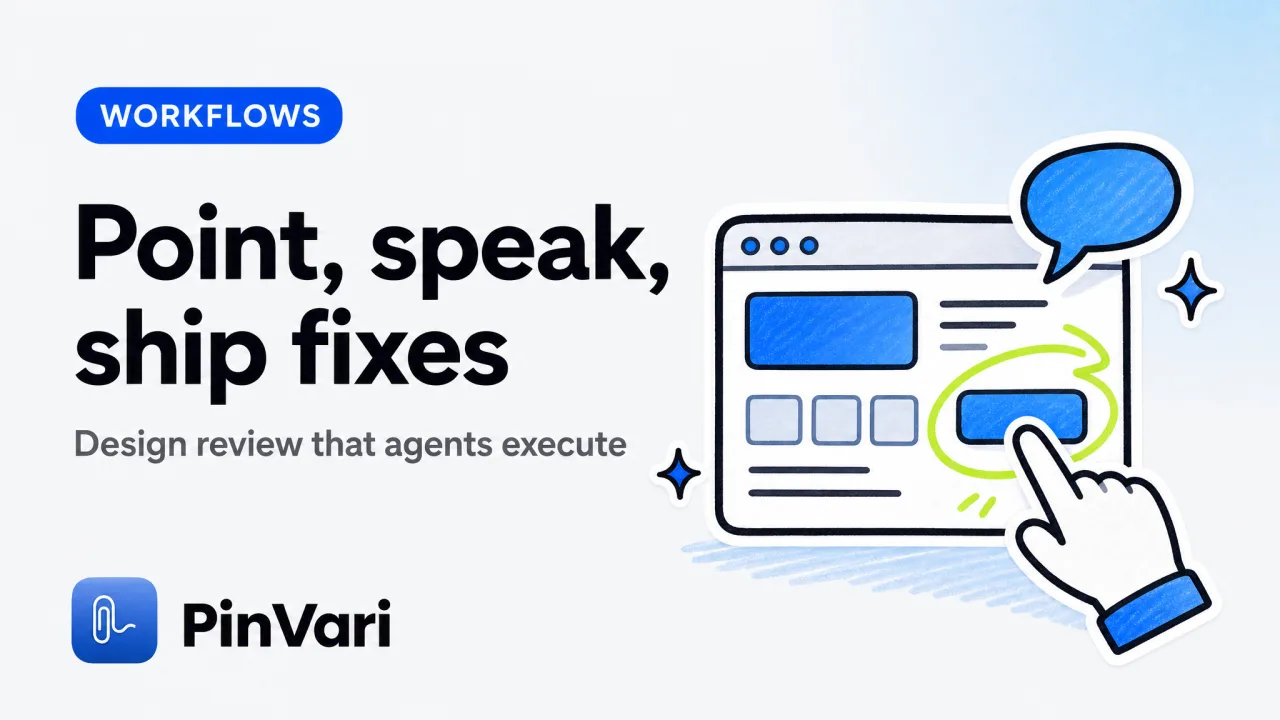
Design review software engineering is the workflow where you point at a UI element, name what's wrong, and the feedback resolves to an executable instruction — not a paragraph. Most teams screenshot, annotate in prose ("the button feels off"), paste into Slack, and watch developers guess which button on which screen. A real design review process captures the named element (role, label, frame, parent chain), pairs it with the spoken instruction, and files it to a tracker or sends it directly to an AI coding agent that can act on named targets. The difference: ambiguity vanishes, fixes land in one try, and reviewers stop writing novels.
Why do most design reviews fail in engineering workflows?
Most design review software treats the screen as pixels. You circle a region, type a comment, and export a JPEG or PDF. The developer opens it, eyeballs the red circle, searches the codebase for a button that looks like the circled one, guesses the file, and ships a fix. When the guess is wrong — maybe they fixed the wrong button, or the screenshot was from a stale branch — you write another comment. The loop repeats.
The root cause: the annotation never resolved the UI element. A screenshot is evidence, not an instruction. Software engineering workflows demand named targets — LoginButton in AuthView.swift, not "the blue button near the top." Design review tools built for agencies (Marker.io, BugHerd) or QA teams (Userback) focus on collaboration and dashboards but stop short of element resolution. They're designed for handoff between humans, not execution by agents or direct commits.
A real design review process for engineering must answer three questions at capture time: which element (resolved via the accessibility tree or DOM), what's wrong (transcribed instruction), and how confident are we (a score that blocks guesses). Tools that answer all three integrate into the build-fix-verify loop. Tools that answer one or two stay in the feedback layer.
Key principle: If the feedback can't name the element, it's a conversation starter, not a work item.
What does a working design review software engineering process look like?
A complete design review process runs five steps: capture, resolve, file or send, fix, verify. Here's how it works when the toolchain is set up correctly.
1. Capture the element and instruction
You hold a hotkey (PinVari uses ⌥⌘A), circle or point at the on-screen UI element, and speak the instruction. The tool screenshots, transcribes on-device, and logs exactly where the pointer was when you said deictic words like "this" or "here." The capture includes the full window text (up to 40,000 characters, even content scrolled out of view), the focused app, and the browser URL if applicable.
2. Resolve the named element
The tool hit-tests the circled point against the macOS accessibility tree (AXUIElementCopyElementAtPosition) or the browser DOM and walks up the parent chain until it finds a labeled, actionable element. It returns the role (AXButton, AXTextField), the label or title, the on-screen frame, and any identity attributes (DOM ID, CSS class, ARIA label). If the point lands on an accessibility-blind surface (canvas, some Electron windows), the tool falls back to on-device Vision OCR and flags the result with lower confidence.
A confidence score (0.0–1.0) tells you whether the resolution is solid. Above 0.8 is actionable. Below 0.8 triggers a human review — the tool asks you to confirm or re-mark rather than file ambiguous work. This prevents the agent from guessing.
3. File to a tracker or send to an agent
If you're working with a human developer, the resolved instruction goes into Linear, GitHub Issues, or Slack. The ticket includes the element path, the instruction transcript, the confidence score, and the cropped screenshot. The developer opens the ticket, sees ProfileImageView → AXButton "Edit", searches the repo, and lands on the right line.
If you're working with an AI coding agent, the capture flows over a local MCP server. The agent calls pinvari_next_instruction, receives the named element and the spoken task, locates the file, edits, and runs tests. You review the diff, approve or reject, and the agent marks the task done. No copy-paste, no ticket handoff.
4. Fix
The developer or agent makes the change. Because the element was named, they don't search — they go straight to the component. For agents, this is automatic. For humans, it's a grep or an IDE symbol search.
5. Verify
You retest the build. If the fix landed, you mark the ticket done. If not, you re-capture with the same process — point, speak, resolve — and the new instruction references the original attempt. The loop tightens because every iteration names the exact element.
This process works when the design review tool resolves elements, not when it annotates pixels.
| Step | What happens | Tool requirement |
|---|---|---|
| Capture | Screenshot + voice + pointer trail | Hotkey overlay, on-device transcription |
| Resolve | Named element, role, label, frame, confidence score | Accessibility API or DOM access, OCR fallback |
| File/send | Ticket or MCP instruction | Integration with Linear/GitHub or local MCP server |
| Fix | Developer or agent edits the named component | Named target in a searchable codebase |
| Verify | Retest and mark done | Same capture workflow, cumulative history |
Which design review software fits engineering workflows?
Here's how the major tools map to the five-step process.
| Tool | Resolve named elements? | Voice input? | Agent integration? | Price | Best for |
|---|---|---|---|---|---|
| PinVari | Yes (macOS AX tree + OCR) | Yes (on-device) | Yes (local MCP) | $39–59 one-time | Developers reviewing macOS apps + native tools, shipping fixes via AI agents |
| Jam.dev | Partial (browser console + network) | No | No | Free | Browser-only bug reports with console logs, QA teams |
| Marker.io | No (pixel annotations) | No | No | $39+/mo | Agency website feedback, client review dashboards |
| CleanShot X | No (screenshot only) | No | No | $29 one-time | General Mac screenshots, zero UI understanding |
| Userback | No (pixel + metadata) | No | No | $79+/mo | Product feedback portals, user-submitted bugs |
PinVari is the only tool in this list that resolves macOS-native accessibility elements and hands them to an agent over MCP. It works across all macOS apps — Xcode, Safari, Electron, Figma, your SwiftUI build — not just browsers. The interaction is point-and-speak: hold ⌥⌘A, circle the element, say what's wrong, release. The app resolves the element on-device, logs a confidence score, and either files it to Linear or pipes it to your Claude Code agent with one click. No API keys, no uploads by default.
Jam.dev dominates browser-based bug reporting software because it captures console logs, network requests, and session replay for free. Limitation: Chromium only. It can't capture your native macOS app, your IDE, or an Electron window. If your design review process stays in the browser, Jam is unbeatable. If you review cross-platform builds or native UIs, it's blind.
Marker.io proves agencies pay ~$39/month for website annotation. It's built for client feedback loops — stakeholders mark up a staging site, the team discusses in a dashboard, a developer eventually interprets the feedback. No voice, no element resolution, no agent handoff. It's human-to-human collaboration, not human-to-agent execution.
CleanShot X is the Mac screenshot standard ($29 one-time). It captures, annotates, and exports beautifully. Zero understanding of what's on screen. Use it for documentation; use something else for design review that feeds engineering.
Choosing a tool: If you review browser apps and want free console capture, Jam.dev. If you review native macOS apps or work with AI coding agents, PinVari. If you need a client-facing annotation dashboard, Marker.io.
How do you connect design review software to an AI coding agent?
The cleanest path is Model Context Protocol (MCP). PinVari installs a connector at ~/.pinvari/mcp/pinvari-mcp that talks to the running app on 127.0.0.1:3402. You connect in one click inside PinVari (PinVari → Connect → Claude Code / Cursor / Codex) or via CLI:
claude mcp add --scope user pinvari -- "$HOME/.pinvari/mcp/pinvari-mcp"Once connected, the agent sees two tools: pinvari_next_instruction (fetch the next unresolved capture — named element, spoken instruction, cropped screenshot) and pinvari_mark_done (close the task). The workflow becomes:
- You review a build, hold ⌥⌘A, circle a misaligned button, say "move this 8 pixels left."
- PinVari resolves
SubmitButtoninCheckoutView, logs the instruction, and lights up the notch island. - You tell your agent "fix the next PinVari task."
- The agent calls
pinvari_next_instruction, sees the named element and instruction, searches the repo, editsCheckoutView.swift, runsswiftlint, and shows you the diff. - You approve, the agent commits, calls
pinvari_mark_done.
No copy-paste, no Slack messages, no "which button?" roundtrips. The agent acts on the same named element you pointed at. Full setup guide: pinvari.com/mcp.
For agents without MCP support (or if you prefer manual triage), PinVari can file directly to Linear or export to JSON. The Linear ticket includes the element path, the instruction, the screenshot, and the confidence score. Your developer opens the ticket and gets a grep target, not a treasure hunt.
Agent integration turns design review from a conversation into a build step.
What's the copyable checklist for a design review session?
Here's the step-by-step rundown for reviewing a macOS build or website. Copy this, adjust the tool names, and run it end-to-end.
Pre-session setup (one-time):
- [ ] Install PinVari (or your chosen design review tool)
- [ ] Connect to your AI agent via MCP or set up Linear/GitHub integration
- [ ] Open the build or staging site you're reviewing
- [ ] Set the hotkey (⌥⌘A for PinVari) and test a dummy capture
During the session:
- [ ] Navigate to the first screen or component
- [ ] Hold the hotkey, circle or point at the element, speak the issue (be specific: "move this 8px left" not "fix spacing")
- [ ] Release the hotkey; verify the notch island shows the capture
- [ ] Repeat for each issue — multiple marks per capture if they're on the same screen
- [ ] Check the Command Center: each capture should show a ≥0.8 confidence score; if <0.8, re-mark or add a manual note
- [ ] Tell your agent "fix all PinVari tasks" or manually file the low-confidence ones to Linear
Post-session:
- [ ] Agent commits fixes or developer closes tickets
- [ ] Retest the build; for any incomplete fixes, re-capture with the same process
- [ ] Archive resolved captures; keep the unresolved ones visible
This checklist assumes named-element resolution at every step. If your tool only screenshots, add a manual "identify the component" step before filing — that's the gap PinVari closes.
Common mistake: Saying "this needs work" without specifying what work. The transcription is literal. Say "change the button color to #3A7FFF" or "increase line-height to 1.6" — actionable instructions the agent or developer can execute.
How does design QA differ from design review?
Design QA is regression testing against a spec. You're verifying that shipped code matches the approved design: correct colors, spacing, typography, interactive states. It's pass/fail with a checklist. Design review is evaluative feedback during development: "this spacing feels tight," "try a bolder weight here." QA is binary; review is iterative.
Both workflows benefit from element-level capture, but the output differs. In QA, a failed test becomes a ticket: "SubmitButton background is #2A6FDF, spec says #3A7FFF." In design review, the feedback might be: "try #3A7FFF here and see if it pops more." QA resolves to a single correct answer; review resolves to a next iteration.
Design review software that works for QA must support bulk capture (mark ten issues in one pass) and regression tracking (compare this build to the last one). PinVari's multi-mark captures and per-app session history handle this. Tools without element resolution (Marker.io, Userback) force manual comparison — you screenshot both builds, overlay them, annotate differences. That's viable for small teams but doesn't scale.
For engineering teams, the design review process and design QA process converge on the same toolchain: point at the element, name what's wrong, let the agent or developer fix it by name. The only difference is tone (evaluative vs. binary) and the approval gate (iterative consensus vs. spec match).
FAQ
What is design review software engineering?
Design review software engineering is the workflow where UI feedback resolves to named, executable instructions rather than prose. You point at an on-screen element, speak the issue, and the tool resolves the element's role, label, and frame via the accessibility tree or DOM. The output is a ticket or an agent task that names the exact component — LoginButton in AuthView.swift, not "the blue button" — so fixes land in one try. It's the engineering layer on top of traditional design annotation.
Can I use design review software with AI coding agents?
Yes, if the tool exposes an MCP server or API. PinVari hands resolved elements and spoken instructions to Claude Code, Cursor, Codex, or any MCP-compatible agent over a local server at 127.0.0.1:3402. The agent calls pinvari_next_instruction, gets the named element and task, locates the file, edits, and shows you the diff. One-click setup inside the app or via claude mcp add --scope user pinvari -- "$HOME/.pinvari/mcp/pinvari-mcp". Tools that only export screenshots (CleanShot X, most annotation apps) can't feed agents directly; you'd paste the image into the chat and describe the element in prose, reintroducing ambiguity.
What's the best design review tool for native macOS apps?
PinVari is the only tool that resolves macOS-native accessibility elements across all apps — Xcode, Safari, Electron, Figma, SwiftUI previews. It uses AXUIElementCopyElementAtPosition to hit-test the circled point, walk the parent chain, and return the named element with a confidence score. Jam.dev only works in Chromium browsers. Marker.io and Userback are web-only. CleanShot X screenshots but doesn't resolve elements. If you're reviewing a native macOS build and want feedback that names the exact NSButton or AXTextField, PinVari is the category of one.
How do you prevent ambiguous design feedback in engineering workflows?
Attach a confidence score to every resolved element and block work items below 0.8. When a tool resolves a UI element via the accessibility tree or DOM, it should report how confident it is — based on whether the element has a label, a role, identity attributes, and a stable parent chain. PinVari logs this as a 0.0–1.0 score. Above 0.8 means the element is uniquely identifiable; below 0.8 means the resolution is a guess (maybe the point landed on a bare AXGroup with no label, or OCR returned multiple matches). Queue low-confidence captures for human review instead of filing them as tickets. This prevents agents from guessing and developers from fixing the wrong component.
What's the difference between design review software and bug reporting software?
Design review software captures evaluative feedback during development ("try a bolder font here," "tighten this spacing"). Bug reporting software captures defects against a spec ("button color is wrong," "form doesn't submit"). Review is iterative and subjective; bug reporting is binary and spec-driven. Both benefit from named-element resolution, but review tools emphasize voice input and multi-mark captures (mark ten things in one pass), while bug tools emphasize session replay and console logs. Jam.dev is a bug tool; PinVari works for both but optimizes for review + agent handoff. Marker.io is a review tool for agencies but lacks element resolution.
Can design review software replace Linear or GitHub Issues?
No, it feeds them. Design review software captures and resolves the feedback; Linear and GitHub track the work item, assign it, and close it. PinVari files directly to Linear via API (the ticket includes the named element, instruction, screenshot, and confidence score) or exports JSON for manual import. The value is that the ticket arrives with a grep target instead of a paragraph. The developer opens the Linear issue, sees ProfileImageView → AXButton "Edit", searches the repo, and lands on the right file. The tracker is still the source of truth; the design review tool is the capture layer.
---
Most design review processes fail because they annotate pixels instead of resolving elements. A screenshot with a red circle is evidence, not an instruction. A working design review software engineering workflow names the exact UI component, pairs it with a spoken task, and hands it to an agent or developer who can act without guessing. The five-step process — capture, resolve, file or send, fix, verify — works when the toolchain supports element-level resolution and confidence scoring. For teams reviewing native macOS apps or working with AI coding agents, PinVari closes the loop from point-and-speak to committed fix. For browser-only QA, Jam.dev is unbeatable and free. Choose the tool that matches your surface and your handoff target, then run the checklist end-to-end.
Hand your agent the exact element
PinVari resolves what you point at into a named, executable instruction — on-device, no keys, your own agent. One click inside PinVari connects Claude Code, Cursor, VS Code or Codex — or paste one CLI line from pinvari.com/connect.
PinVari → Connect → your agent (one click)Get PinVari — $39 →