Cursor Screenshot: Capture UI Elements & Context Fast
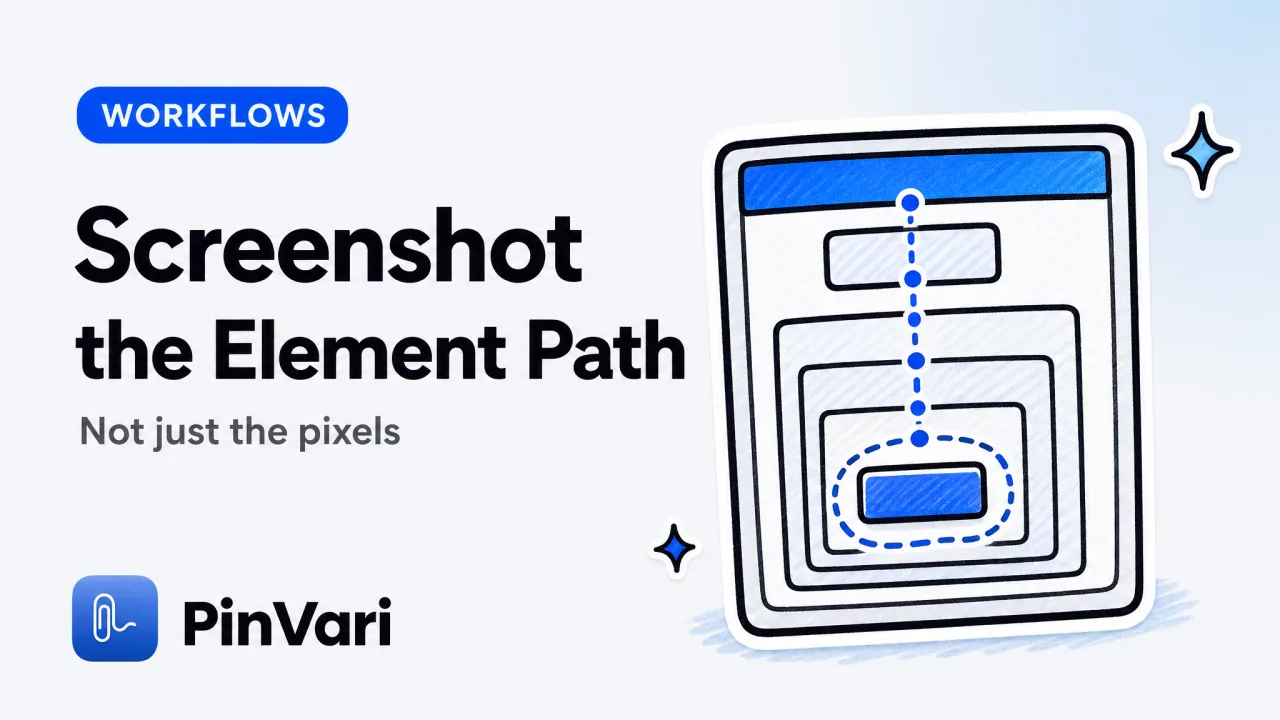
A Cursor screenshot workflow that only captures pixels forces developers to guess which element broke. The QA-to-dev cycle collapses when your report includes the named accessibility element, the exact spoken instruction, and the visual proof in one capture, so the AI agent or engineer can reproduce the bug in seconds instead of asking "which button?"
Most guides treat screenshots as an afterthought: press a hotkey, paste an image, hope the developer interprets the red arrow. That breaks when the UI element has no visible label, lives in a nested component tree, or changes state on hover.
You need the element's role, title, frame coordinates, and parent chain, the same data the macOS Accessibility API exposes and Cursor agent mode can act on when you feed it through an MCP server.
What makes a Cursor screenshot workflow actually reproducible?
A reproducible workflow gives the AI agent or developer three artifacts: the screenshot cropped to the region you circled, the named UI element (role + title + AX path), and the spoken or typed instruction. Cursor's built-in paste-image command shows the agent what you see, but it can't resolve "the blue Save button in the second modal" to AXButton "Save" frame:(820,340,120,32) parent:AXGroup "Untitled Modal" > AXWindow "Settings" without external tooling.
The gap: Cursor has no native screen-pointing API. You either describe the element in text (slow, ambiguous) or paste a whole-screen PNG and hope the vision model infers the target (unreliable on overlapping controls, Electron apps with no DOM, or canvas-rendered interfaces).
The agent can't click or inspect what it can't name.
A complete workflow captures the UI element at the instant you point, resolves its accessibility tree position, and pipes both the cropped screenshot and the element metadata into Cursor via MCP. That's reproducible: the agent reads AXButton "Submit" index:4 and the instruction "change this to say 'Send Feedback'", loads the code for that component, and applies the fix without asking which of the five unlabeled buttons you meant.
Reproducible = screenshot + named element + instruction. Pixels alone make the developer guess; element paths make the agent act.
How do you capture a screenshot with element context in Cursor?
You need a tool that can hit-test the macOS Accessibility API to resolve the UI element under your pointer, take a screenshot at the same instant, and export both to an MCP server Cursor can read. The manual path: use the Accessibility Inspector (Xcode → Open Developer Tool → Accessibility Inspector), hover over the target, note the role/title/frame, take a screenshot with ⌘⇧4, then type the element path and paste the image into Cursor.
That takes 60+ seconds per element.
The automated path: install an MCP-connected capture tool that does the hit-test, screenshot, and export in one hotkey. PinVari installs a local MCP server at ~/.pinvari/mcp/pinvari-mcp and connects to Cursor with one click (PinVari → Connect → Cursor) or via CLI:
# From the PinVari app directory or with the connector in PATH
cursor mcp add --scope user pinvari -- "$HOME/.pinvari/mcp/pinvari-mcp"
Once connected, press ⌥⌘A, circle the UI element while speaking the instruction (or draw silently and type later), then press ⌥⌘A again to finish. The capture appears in the notch island HUD.
The agent calls pinvari_next_instruction and receives:
- The cropped screenshot of the circled region.
- The element path:
AXButton "Delete Account" frame:(50,120,200,40) parent:AXGroup "Account Settings". - The spoken instruction:
"this should be disabled until the user confirms". - The confidence score (0.0-1.0; below 0.8 triggers a clarification request).
The agent loads the component code, finds the button by title or AX path, applies the fix, and marks the capture done with pinvari_mark_done. Total time: under 10 seconds from point-to-commit.
Multi-region captures: Circle three buttons in one breath, each gets its own word bucket and element path. The agent processes all three in sequence.
What's the difference between Cursor screenshot tools and accessibility-first capture?
Most screenshot tools (CleanShot X, native macOS ⌘⇧4, Jam.dev) capture pixels. Accessibility-first tools capture the UI element metadata alongside the image.
Here's the comparison:
Skip the wide grid. Read each option as a card.
#
PinVari
Captures Named Elements: ✅ (AX API + OCR fallback)
On-Device OCR: ✅
MCP Integration: ✅ (pinvari-mcp)
Voice Input: ✅ (on-device transcription)
Multi-Display: ✅
Price: $39 one-time
#
CleanShot X
Captures Named Elements: ❌
On-Device OCR: ❌
MCP Integration: ❌
Voice Input: ❌
Multi-Display: ✅
#
Jam.dev
Captures Named Elements: ✅ (browser only)
On-Device OCR: ❌
MCP Integration: ❌
Voice Input: ❌
Multi-Display: ❌ (Chromium tabs)
Price: Free / $39+/mo teams
#
macOS ⌘⇧4
Captures Named Elements: ❌
On-Device OCR: ❌
MCP Integration: ❌
Voice Input: ❌
Multi-Display: ✅
Price: Free
#
Marker.io
Captures Named Elements: ❌ (webpage annotation)
On-Device OCR: ❌
MCP Integration: ❌
Voice Input: ❌
Multi-Display: ❌
Price: $39+/mo
Jam.dev is unbeatable for browser DevTools capture (console logs, network tab, session replay), but it can't capture native macOS apps, Electron windows outside Chromium, or Xcode. CleanShot X is the king of pixel-perfect scrolling screenshots and OCR-to-text, but it doesn't resolve which <button> you circled.
PinVari bridges the gap: it reads the AX tree on any macOS app, falls back to on-device Vision OCR when the tree is empty (canvas UIs, some games), and exports element paths + screenshots to Cursor MCP or tracking tools (Linear, GitHub, Slack).
The moat: macOS exposes AXUIElementCopyElementAtPosition to resolve the element under any screen point. PinVari walks the on-screen window list (chainExcludingSelf) to hit-test the real app, not its own overlay, and retries with AXManualAccessibility when Electron/Chromium builds the tree lazily.
When a point lands on an unlabeled AXGroup, labeledDescendant walks to the deepest labeled child. Chromium identity attributes (AXDOMIdentifier, AXDOMClassList) give title-less nodes names.
How do you connect a screenshot MCP server to Cursor agent mode?
Cursor reads MCP servers from ~/.cursor/mcp.json (user scope) or .cursor/mcp.json (workspace scope). A minimal config looks like:
{
 "mcpServers": {
 "pinvari": {
 "command": "/Users/yourname/.pinvari/mcp/pinvari-mcp"
 }
 }
}
Critical: the PinVari app must be installed and running (the connector talks to it on 127.0.0.1:3402). If you see ECONNREFUSED, launch PinVari.app first.
The one-click connect inside PinVari (PinVari → Connect → Cursor) writes the JSON for you and restarts Cursor's MCP daemon. Verify the connection: open Cursor, start a composer session, type @pinvari , autocomplete should show pinvari_next_instruction and pinvari_request_capture.
Once connected, the workflow is:
- Make a capture (⌥⌘A → circle → speak → ⌥⌘A).
- Start a Cursor agent session (⌘K or composer).
- The agent auto-calls
pinvari_next_instruction(if you're using Cursor rules that check for pending captures) or you prompt it:"Fix the next PinVari capture". - Agent receives the cropped screenshot, element path, and instruction.
- Agent applies the fix, then calls
pinvari_mark_doneto close the capture.
The notch island shows pending captures; the Command Center (PinVari → Show Command Center) lists all captures grouped by app. Each capture remembers which monitor it was drawn on; one capture can span multiple displays.
Cursor context used: the screenshot and element path count against Cursor's context window. A 1920×1080 screenshot at 72 DPI ≈ 150-300 tokens (vision model dependent). Keep captures focused, circle only the broken element, not the whole screen.
What if the element has no accessibility label?
When the AX tree returns an empty title (common on <div>-based custom controls, canvas UIs, or games), PinVari falls back to on-device Vision OCR (Apple's VNRecognizeTextRequest). The OCR reads any visible text inside the circled region and attaches it as a pseudo-label: AXUnknown frame:(100,200,50,30) OCR:"Submit".
The agent treats it like a labeled element.
If OCR finds nothing (icon-only buttons, pure graphics), the capture includes the screenshot cropped to the circle and the frame coordinates. The confidence score drops below 0.8, and the agent asks: `"I see a button at (100,200) with no label.
What does it do?"` You clarify in text, the agent updates the capture's instruction field, confidence rises, and it proceeds.
On Electron/Chromium apps, PinVari sets AXManualAccessibility and retries the hit-test after ~150ms to force the lazy AX tree to populate. Chromium identity attributes (AXDOMIdentifier, AXDOMClassList) give nodes a fallback name even when aria-label is missing.
The system is designed to never silently guess, if confidence is low, it asks.
FAQ
#
Can I use Cursor screenshot workflows without an MCP server?
Yes, but you lose the named element path. Press ⌘⇧4 (native macOS), drag the crosshair over the UI element, paste the image into Cursor with ⌘V, and describe the element in text ("the blue Submit button in the top-right modal").
The vision model will locate it ~70% of the time. For better accuracy, use the Accessibility Inspector (Xcode) to note the element's role + title + frame, then paste both the screenshot and the AX path as text.
An MCP server automates this and gives the agent executable element paths instead of descriptive guesses.
#
Does PinVari work with Cursor on Intel Macs?
Yes. PinVari runs on macOS 14+ (Sonoma), Apple Silicon and Intel.
The on-device transcription (Apple Speech framework) and OCR (Vision framework) work on both architectures. The MCP connector is a native binary compiled for both arm64 and x86_64.
Install from the notarized DMG at pinvari.com, connect to Cursor, and the workflow is identical.
#
What happens if I circle multiple elements in one capture?
PinVari resolves each circled region to its own element path and assigns spoken words to the nearest mark based on timestamp. If you circle three buttons while saying "fix this, disable that, rename the other one", the word "this" binds to the pointer location at the instant you said it (deictic resolution).
The agent receives three separate element paths in one pinvari_next_instruction call and processes them in sequence. This is faster than three separate captures when filing a batch of related bugs.
#
Can I export Cursor screenshots to Linear or GitHub Issues?
Yes. PinVari's Command Center has an Export button that generates a shareable page or files directly to Linear/GitHub/Slack (configure in Settings → Integrations).
The export includes the screenshot, the element path, the instruction, and the app context (bundle ID, window title, URL if it's a browser). Linear users get a pre-filled issue with the screenshot attached and the element path in the description.
GitHub users get a markdown-formatted issue body. This is the bridge between QA capture and developer tracking.
#
How do I troubleshoot Cursor MCP connection errors?
Check three things: (1) PinVari.app is running (the MCP connector talks to 127.0.0.1:3402, if the app isn't open, you'll see ECONNREFUSED). (2) The connector path in ~/.cursor/mcp.json points to the actual binary ("$HOME/.pinvari/mcp/pinvari-mcp", expand ~ to the full path if Cursor's shell doesn't).
(3) Restart Cursor after editing mcp.json (the MCP daemon reloads on launch). Verify: type @pinvari in a Cursor composer session, autocomplete should list pinvari_next_instruction.
If it doesn't appear, check Cursor's MCP log (Help → Show Logs → filter "MCP").
#
Does the screenshot cropping happen client-side or server-side?
Client-side, on your Mac. PinVari captures the full screen (or the region you circled), resolves the AX element, crops the screenshot to the circled bounding box, and passes the cropped image + element metadata to the MCP server.
Nothing is uploaded to a remote service by default. The MCP server runs locally (127.0.0.1), and Cursor reads the data over a Unix socket.
If you export to Linear/GitHub, the screenshot uploads to their servers (via their API), but the core capture-to-agent flow is entirely on-device.
Hand your agent the exact element
PinVari resolves what you point at into a named, executable instruction — on-device, no keys, your own agent. One click inside PinVari connects Claude Code, Cursor, VS Code or Codex — or paste one CLI line from pinvari.com/connect.
PinVari → Connect → your agent (one click)Get PinVari — $39 →